Fall Fly Fishing Clark Fork River

Choosing The Best Fly Rod

I’ve been selling fly rods since 1985. I’ve made a lot of mistakes over that time period. Here’s what I think I’ve learned about helping anglers choose the best fly rod for their casting style.

My opinion doesn’t mean a @#?*>^%$ thing when it comes to your rod choice. I like the rods I like because of the way I cast.

I’ve been teaching fly casting since 1988. Unless your body shape resembles mine (and all gods help you if it does), I’ve learned your cast won’t look the same as mine, no matter how long you practice. The cast works around your body. It’s like batting stances. All those different stances made it to the majors. Batting stances follow fundamental tenets, but vary all over the map, and they’re all pros. Like a batting stance, casting is based around your body’s strengths and weaknesses, which might not be the same as mine.

My casting style comes from body shape, strengths and weaknesses, and practice. It’s not yours, it’s mine. Yours can come close, but won’t be exact. That’s important to know when you go to choose the best fly rod for your casting style.

That’s why my opinion doesn’t mean a thing. Unless you cast the way I do, my rod choices may not be yours.

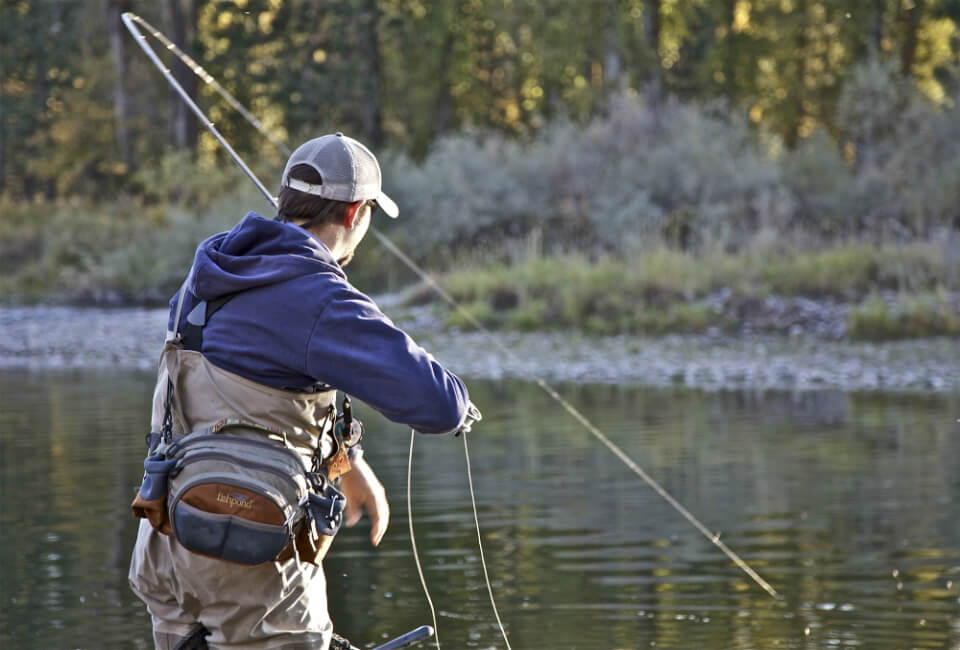
If you go somewhere to buy a rod and they don’t have try lines, meaning you can’t cast the rod before you buy it, go somewhere where they will let you cast the rod.

I’ve seen it all. How anglers try to figure out how a rod will cast without casting it. Oscillations per minute under pressure. Got that one from Ted Williams. Pressing the rod against the ceiling and judging from the resistance how it will cast. Same as pressing it against the floor. The violent wiggle. The gentle wiggle. The intensely scrutinized, synchronized with the elbow and wrist wiggle. None of it means a damn thing. You have no idea how that rod will cast till you put a line on it. Don’t buy a rod without casting it or there’s no way you’ll get a fly rod that fits.

Never listen to the salesperson if they give you casting advice when buying a fly rod. Yes, the salesperson is trying to help. Yes, what the salesperson says is very likely useful AT THAT MOMENT, but how much are you going to actually retain, how much will you change?

I can’t tell you how many times I’ve been guilty of this. Wanting to help, but really causing more problems. Adding my 2 cents as the customer strays further and further away from choosing the best fly rod for their casting style..

When I teach casting, I have a method and style I ascribe to. If I’m blabbing about it while you’re test casting a rod, it might mean you have issues with your casting. Or, I may have cast the rod you’re looking at and thrown it 90 feet, and you want to know how I did that. Answer to that- I practiced. But whatever I say, whatever I show you, is going to alter your cast at the moment, very likely into a casting style I favor, which will lead you to buy a rod in the casting style I favor. Which may not be your style in the real world. It’s not my rod, it’s your rod. Don’t change your casting style when buying a rod.

If, after you’ve made your rod choice, you ask for advice, I’ll gladly give it. Having seen your style and what you chose for a rod, I’ll give the best advice I can. But not until you’ve made a decision.

So, what do you look for when buying a fly rod? What’s the most important thing to watch to get a fly rod that fits?

THE BACK CAST. SAY IT AGAIN, THE BACK CAST

When I’m selling a rod, the only thing I look at is the back cast. I do that because I know the last time the buyer looked at their back cast was the last time they practiced casting.

When was the last time you practiced casting?

That’s what I thought.

If you’re buying a rod and know enough to cast and compare, then you’re at least an intermediate caster. This is my definition of an intermediate caster. The front cast is basically functional to good, but the back cast looks like the Shadow Casting poster, with swirls of line in all sorts of shapes and designs.

Basically, the back cast is no damn good. And a good back cast is the foundation for a good cast. But people find ways to make that silliness behind them work. If the front cast is landing OK, then it’s all good.

When a potential buyer is comparing rods, I don’t watch the cast, I watch the back cast. Which rod provides the caster with the best shaped back cast? The front is going to be OK- that’s the definition of an intermediate caster. Which rod throws the most natural back cast, which forms the best loop. That’s the rod to choose, the fly rod that casts best on the back cast.

It’s this simple. Since most casters don’t pay attention to their back cast, the rod that throws the best back cast is the rod that naturally fits the casters stroke. I don’t care how far the rod throws, I don’t care which rod the caster prefers, I watch the back cast and recommend the rod that throws the best back cast. That’s the key to getting the best fly rod for your casting style.

That’s the secret. The cats out of the bag. Now, how does a rod shopper avoid the Hawthorne Effect?

That’s also a simple fix. Stretch a little line out, and cast a bit further, or try to cast a shorter……….

Wait, are you wondering what the Hawthorne Effect is? It’s the effect the observer has on the observed. Because now the caster knows their back cast is being analyzed, they will try and change it.

Here’s something else I’ve learned. The lack of attention by most anglers on the back cast has ingrained some pretty interesting habits. Most casters couldn’t break those dubious habits for a $1000 bet. (I’ve done enough teaching to be comfortable in that statement!) All I have to do is change the casting from something comfortable, where a caster can focus on their back cast (Hawthorne Effect) to an uncomfortable cast. So I ask the test caster to add some line, or shorten the line, or turn and cast into the wind. I make them do something a bit uncomfortable.

Boom!

The back cast is right back to where it was when you started casting and didn’t know I was watching. Change focus, add difficulty, and the habits come back. Hawthorne is alleviated!

Test casters look at me, staring behind them, and wonder what I’m doing. I’m watching the part they’re not, and making my assessment. While I have a vested interest in the customer buying a fly rod from me, I don’t have a vested interest in what rod it is. Whether I like it or not is completely irrelevant. It’s not my rod. I’m looking for the rod that fits the casting style of the person casting.

The back cast tells me which rod that is.

Use Technology To Boost Your Casting

As an aside, when the concept of a video camera was new I was teaching casting in New Hampshire. We rented a VCR camera for the Intermediate class, and taped the students. Every single student, over the course of the 3 years we ran the class, was stunned at how crappy their back cast was. How close it came to the ground, how mis-shapen it was, how slowly it moved. Every single student. They didn’t choose the best fly rod for their casting style.

It’s tough to make something good happen in front when you have dog poo behind you.

However, you can’t fix it if you don’t know it’s a problem. So get your phone out and have someone video your cast. What’s your final goal? If you were being videoed from just above your head, a watcher couldn’t tell which direction you were casting. Another way to say it- the back cast is a mirror image of the front cast. Click here to find out how to set up the perfect practice area.

When I get a customer whose back cast is a mirror image of the front cast, I just shut up and get different rods as they ask. Or if I see something in their cast, I may recommend a rod they hadn’t thought of. But when the back cast matches the front cast, I don’t really do all that much other than string up rods.

Who knew, when buying a fly rod, that the most important thing to look for is the one thing most anglers pay no attention to. It took a long time to figure

this out, and I stand by this method of rod assessment. It makes for happy customers; it makes it easy to choose the best fly rod for YOUR casting style.

Blackfoot River Montana Salmonfly Hatch

What is the best fly rod length

It’s a thorny question, one that brings out the opinion of anyone asked. When you buy a fly rod, you make a choice. And with the cost of fly rods, it must be a well thought out choice. When deciding on the best fly rod length, here are the things to think about.

The Physics Of Rod Length

The only thing about rod length that can’t change is physics. From a physics standpoint, longer rods mend better and hold more energy- allowing longer casts. Shorter rods fight fish better. Those two statements can’t be refuted. Mending and fish fighting are easy to understand, distance a bit more so.

A longer rod (in the fly fishing industry, that’s over 9’) generates more energy, and casts further. However, that energy needs to come from somewhere, and that somewhere is you. Think about spey rods. They can be 16’ long, and a good spey caster throws 140 feet plus. You need two hands/arms to generate the power to make a rod that long work. Try casting a spey rod with one hand, and if you do, don’t sprain anything. The energy required and the swing weight will tear your wrist up. When we say swing weight, we mean the energy required to maintain position while the front or back cast extends to load the rod.

This holds true for all fly casting- all rod lengths and line weights. A 10’ 9 weight will cast further than a 9’ 9wt, which casts further than an 8’ 9wt. However, energy generation and swing weight multiplies with length, making a 10’ 9wt a beast to cast. Swing weight and energy generation lessen as the line weight lessens, but is still present. All rods need energy and have a swing weight- it gets more pronounced the longer the rod

Manufacturing Fly Rods

Manufacturers tell you a 9’ rod is the best fly rod length. This is based on two premises. Prior to graphite, cane and fiberglass rod makers knew the physics, but the materials made length difficult to achieve. With graphite, longer rods were now a better option. However, ferruling and blank rolling became issues.

In graphite’s infancy, ferrules were terrible. They created flat spots in the action, so rods were two pieces to minimize that affect. A 10 foot rod needed two 5’ pieces, and early graphite rolling machines couldn’t handle that length. The best they could roll consistently were 4.5 foot lengths. You didn’t want crappy ferrules or a curved blank, so manufacturing settled on 9 feet.

The other factor is development. Manufacturers have been working with 9’ rods for 50 years. You can be sure they have that taper DOWN. Spend 50 years refining anything, and it gets pretty darn good. Even with exponentially better ferrules and rolling machines, the tapers developed by the manufacturers still focus on 9’ feet, where the most R&D work has been done.

How Usage Affects Fly Rod Length

But the real measure of best fly rod length is usage. How will the rod be used, where will the rod be used. What do you NEED from your fly rod. Let’s look at this from a trout fishing perspective.

Well, it doesn’t make much sense to use an 11’ rod on a stream 8 feet wide. That’s problematic from the word go. Conversely, it doesn’t make much sense to use 7’ rod on a river 100 yards wide. Neither rod works well in those situations

Small waters fish better with a shorter rod, it’s as simple as that. They’re lighter in hand, more accurate and less fatiguing. When a long cast is 35 feet, a 7’ rod will make the required mends and other presentations. Small waters, for the most part, have smaller fish, and you can throw small streamers with a shorter rod. You can Euronymph with a short rod on small water- not as well as with a longer rod, but it can be done.

Yes, short rods are more accurate. Imagine pressing a door bell. It’s easy with a pencil, more difficult with a 36 inch dowel, harder yet with a 7’ stick and even more so with a 10’ stick. Short equals accurate.

In our minds, the best fly rod length comes down to distance and mending. We have big rivers in Missoula, which require both. We throw big streamers, dry/droppers and massive double nymph rigs, sometimes with lead.

When casting some of that junk, one thing a long rod does that few think of is keeping the fly away from your nose! Just sayin’. . .

How To Choose The Best Fly Rod Length

If we had to make a bold statement, if you fish water 25’ or wider, a 9’ rod or longer is the way to go. That comes with this caveat, in fertile land, where trees grow thick, a 25’ stream can have a covering canopy, or close to it. Short may be a better option in that environ. With that explained, if you fish water without a canopy, get a 9’ or longer rod, even if it’s 15 feet wide. If you can wade the smaller waters, you can use a longer rod. One of the best features of a river is no trees in it to foul up the back cast.

Wow, bet you thought it was going to be more complicated. Nope. Straight physics says a longer rod works better, except for fighting fish. And face it, we’re catching trout. While they get big, and 4-6 weights are considered light tackle fishing, trout are not tarpon or wahoo.  They fight, but with 5X coming in at 5 lb test, you can land trout comparatively quickly. The longer rod is not going to significantly fatigue most anglers when fighting trout, nor overly tire from casting a longer rod all day.

The longer rod mends better, adds distance, and fights the wind better. It’s simple math.  

However, another reason for short rods in fertile land. The longer the rod, the trickier it is to maneuver through the brush. We know a lot of long rodders who break the rod down to two pieces for easier maneuvering. The longer rod helps keep your fly out of the brush when back casting, but does put you closer to the trees. In our experience, there are less trees than bankside brush.

How long is too long for the best fly rod length? Tenkara rods can be13 feet long, but they weigh less and cast shorter distances. Distance equals energy expended. Tenkara rods have swing weight, and need to be maneuvered through brush, but on the whole aren’t fatiguing. A 13’ 5wt is a trout spey rod, with a handle configuration for both hands while casting.  

For those casting, not Euronymphing or Tenkara fishing, we consider 10’ to be as long as you want to go for single handed casting. Above that length, the rod gets unwieldly to handle, and exponentially more fatiguing as the line weight increases. You also lose accuracy, though the more you use a longer rod, the more accurate you become. For dries and smaller nymph rigs, you can also utilize the extra energy from a long rod by dropping down a line weight. We say a 10’ 4 will do everything a 9’ 5wt does, except cast larger streamers. This math holds true for any length/line weight comparison.

When you start thinking about 7 weights and higher, or using sink tips, a 9’ rod has proven to be the best tool for the job. 9’ rods have a manageable swing weight, and the shorter length applies more leverage for heavier/sunken fly lines during pickup. They don’t fight fish as well as a shorter rod, but since heavier lines are thrown longer distances, we accept the more strenuous fight for cast for distance.

When you think of the best fly rod length, think about the waters you fish most often. Factor in the physics of fly fishing, your comfort zone, what’s available from the manufacturer and what feels best in your hand. Don’t immediately discount a 10’ rod or a 7’ rod- both have their place on the water. But we say go longer whenever possible, because the benefits far outweigh the disadvantages.

Missoula Fly Fishing Lessons

Krieger v. Kreh Fly Casting Techniques

There are two schools of fly casting instruction that dominate fly fishing. One method is espoused by Mel Krieger and Joan Wulff. The other is espoused by Lefty Kreh and others. They are quite different in some respects, and very similar in others. It pays to note that world Fly Casting champion Steve Rajeff uses the Krieger/Wulff method of casting.

In the Krieger method of casting, the rod remains close to vertical through the entire cast, only dropping as the cast is delivered. It maintains the 10-2 casting stroke as most efficient. The elbow is mostly stationary during the cast, with only the forearm and wrist moving to propel the fly line. The wrist hinges to deliver energy to the rod, and the concepts of line control remain the same. The line must be extended behind you before starting forward- the line must be extended in front of you before starting a back cast.

The Kreh method of casting differs in these ways. The rod is held at an angle to the body, and the elbow is not stationary. The upper arm, forearm and wrist are all involved in the cast, with a longer motion through the body. During the elongated casting stroke, the wrist hinges from 10-2.

At the Missoulian Angler, we have employees who are proponents of both casting styles. It’s a matter of style, not substance. Each employee has their reasons for using the particular method, and most casts are a combination of both styles. We feel it’s important to know both styles, and then pick and choose the parts you like and work for you!

Most beginners will be shown the Krieger/Wulff method of casting. It has less moving parts (elbow stationary) and is quickly grasped by beginners. The main difficulty lies in the fact you can’t watch the line on your back cast, and you’re doing it all on feel. The Kreh method is not taught as often, due to the relative complexity of the cast. With a moving elbow, more places are introduced where the cast can have problems. Krieger for simplicity, Kreh for comfort.

Wondering how this relates to your casting instruction? If you click here to go to How To Cast If You Spinfish, you’re going to find the method shown is the Krieger/Wulff school of casting. If you click here to go to How To Cast A rod If You’ve Never Held One Before, you will find the Kreh school of casting. We think at some point, you should click on both links, and learn as much about casting as you can!

Missoula Fly Fishing

Smart Wet Wading

When the weather gets hot, a lot of anglers ditch the waders in favor of comfort. It doesn’t matter how breathable waders are, in 90 degree weather, any extra layer adds a lot of warmth. When the waders come off for comfort, you’ll need to have the proper equipment for a full days fishing when wet wading

Ask any Sergeant about the most important piece of equipment they own, and they’ll tell you about footwear. When your feet are sore or blistered, the rest of the day gets that much longer. Being smart about your footwear when wet wading keeps your feet, and therefore your fishing, in shape.

Wet Wading Footwear

The easiest solution for wet waders is to use neoprene booties. Designed to mimic the neoprene sock found on breathable waders, the neoprene booties allow an angler to use their wading boots. Most anglers are comfortable with wading boots, and the thick neoprene sock allows an angler to wear the footwear they already own.

There are a couple of disadvantages to neoprene socks. When worn in a boat, neoprene socks get really hot. Additionally, neoprene socks allow water to enter. When your feet aren’t immersed in the river, the water trapped in the neoprene sock gets very warm. It’s like a petri dish around your feet, and you run the risk of a serious case of athlete’s foot. When you use a neoprene sock, it works better in a wet wading situation, not as much in a boat.

Many of the best guides in Missoula Montana wear sandals when they’re rowing. Keen and Chacos tend to be the favored footwear in a boat. So much cooler, and so much more comfortable.

When you wear sandals, MAKE SURE you put sunscreen on your feet! Crafty anglers apply waterproof sunscreen before putting on the sandals. Rub the sunscreen between your toes, and make sure you get complete coverage. Sunburn on your feet is sneaky. Because you’re getting in and out of the water, your feet feel cool. But the sun is baking them, and like Sarge said, keep your feet in good shape. Sunscreen is critical for comfortable sandal wear for wet wading.

Sandals have other issues as well when wet wading fly fishing. In low gradient rivers, like the Clark Fork and Bitterroot river near Missoula, sandals are easily worn for wet wading. In higher gradient rivers, like Rock Creek and the Blackfoot, sandals can be a bit more problematic. High gradient rivers have very little scree and cobble- most of the rocks lining the bottom are bowling ball sized or larger. Runoff moves the smaller strata, leaving the big rocks.

Most wet wading is controlled, but not all! It only takes once- having your foot slip off the top of a rock, and wedging your sandaled foot between two stones. Wading boots have a rigid toe box, ankle support and padding. When you wedge between rocks wearing sandals, you run a good chance of scraping your foot or jamming a toe. Wedge a wading boot, and the problems are minimized.

Low gradient rivers have their own issues. The cobble and scree that provides easier wading also suspends and enter into the sandal. Sandals without a toe cap are easy to sluice out when you get pebbles between your foot and the sandal. Sandals with a toe cap provide additional protection when wading, but at least once a day you’re going to end up sitting down and rinsing the gravel out. Wearing socks helps a bit with that, but nothing stops scree from getting into a wet wading sandal and rubbing against your feet. Socks also help block the sun and minimize sunburn.

Please, no mid calf black socks with sandals.

Once you feel the freedom of wet wading, it starts to become a habit, and you try to extend the wet wading season. As you do this, remember the first thing you learned as a young adult- warm beer is cheaper than cold beer, and the fastest way to get your beer cold is put it in ice water. When you’re wet wading in colder weather or colder water, the river is pulling the heat out of your body. It’s easy to get a lot colder than you think you are.

Surprisingly, there are advantages. Most of the time, if you find yourself wading waist deep, you’re standing where the fish were before you got there. Cold weather/water wet wading keeps you shallower and spooking fewer fish.

Plan Ahead

But you need to plan ahead. If the day calls for one fleece layer, wear two if you’re wet wading. You need to keep your core warm, and the additional layer(s) will pay dividends over the course of the day.

Make sure to get out of the water once in a while, even if the fishing is good. Depending on how cold the weather is, once you get cold, it’s tough to get warm again. It’s a lot easier to stay warm than get warm again.

Take this from a life long wet wader- after the fishing day is done, moisturize your feet and lower legs. No, we’re not going to recommend a specific lotion- just get one and rub it on. Constant immersion in water drains the skin of moisture, so you need to replenish it.

A down side to wet wading is the wear and tear on your lower body. When you’re wearing waders, you don’t really care about walking through mild brambles and bracken along the river. About 5 hours into a wet wading day, those thorns and prickers really start to hurt. Take a page from New Zealand guides. They wet wade, but wear a pair of running tights under their shorts. The skin tight fabric doesn’t impede water flow like quick dry pants or waders, so there’s less pressure on your legs. It also protects your legs from most of the thorns and plant life along the edge of the stream.

A big upside to wet wading is you can never go in above your waders. When crossing a river, or wading deep, you’re always worried about flooding your waders with water and being damp for the rest of the day. Hey, you’re already wet, so it makes no difference. You never have to feel the trickle of a new leak in your waders, as the water seeps down the back of your leg.

It pays to wear quick drying clothing, including your underwear. Yes, we’re talking about underwear- no snickering. Cotton may be comfortable when dry, but once it’s wet, it get clammy, uncomfortable, binding and can be a bit rashy. If you plan to seriously wet wade, spring for a pair of quick dry undies, it will make the day a lot more comfortable.

Wet wading is a truly freeing experience on the water. So much more comfortable in hot weather, and if you plan correctly, you can wet wade in conditions that might not be perfect. Getting the proper footwear and clothing is imperative for a comfortable experience. Grab your fanny or sling pack and hit the water, you’ll be amazed at how much cooler, comfortable and free you feel on the water.

Olive CDC Caddis

How To Use CDC Flies

CDC is used in some of our favorite flies, as pictured above. The Last Chance Cripple, Rastaman Stonefly and Hi-Viz Spinner all utilize CDC, and are amongst our best fish takers. CDC’s unique properties adds an almost irreproducible fish attraction. Yet we hesitate to recommend these flies. If an angler doesn’t know how to use CDC flies, their effectiveness can be ruined before the first cast. This sounds odd, but CDC’s performance can be eliminated with floatant.

CDC stands for Cul De Canard, which freely translates to duck’s bottom. CDC feathers are found surrounding a duck’s (or goose’s) preen gland. The preen gland secretes an oil waterfowl use to waterproof their feathers. CDC feathers evolved to maintain shape when the oil is secreted, which preserves insulative properties without “waterlogging”.

As the photo shows, CDC is fluffy. Like all feathers, CDC has a stem with barbs coming off the stem. What makes CDC unique is the barbs extending from the stem also have barbs, and depending on the size, those barbs have barbs as well. When used in a fly, all those little tendrils trap air bubbles.

Why CDC Works

When Gary LaFontaine researched his books, he didn’t rely on empirical evidence. He donned a scuba tank, and went subsurface to watch the naturals and his flies. In his seminal work, Caddisflies, LaFontaine studied emerging caddis pupa. Caddis pupa fill their exoskeleton with gas bubbles, which floats the pupa to the surface when emerging. The bubbles refract light, making the pupa look like a tiny, glowing ball during emergence. To mimic that characteristic, Gary pioneered the use of Antron. Antron is a trilobal material (Antron fibers are extruded in a triangular shape) working as a prism, refracting light just as the natural pupa refracts light via gas bubbles.

Gary didn’t just see caddis pupa. He also observed when insect wings are flush to the surface (such as spinners, cripples, drowned stoneflies and caddis), air bubbles are trapped under the wings. Light refracts through the trapped air bubbles just as in the caddis pupa, creating the distinctive light pattern. A spent wing, whether a spinner or a cripple, telegraphs to the trout, here’s an insect trapped in the surface film and unable to escape.

When a dry CDC feather contacts water, the microfibers trap air bubbles, refracting light like a natural. The critical point is the feather must be dry. This is where CDC becomes a bit tricky to use. When many anglers “gink” their fly, they use enough floatant to drown any dry, especially in hot weather when gel floatants liquify.

How To Properly Dress a CDC Dry Fly

CDC feathers will matt (absorb enough water to lose their shape), if enough liquid is applied. Despite CDC feather evolution, enough moisture drowns the feather. Using too much gink matts the fibers and you can’t get it out, ruining the fly for the moment. The fly isn’t permanently ruined-washing with soap and water restores the CDC to it’s fuzzy original shape. Water also soak CDC feathers over time, but it evaporates- more on that later.

After the initial floatant is applied, CDC feathers should look exactly the same as they did before floatant application. Fly-Agra and High N Dry’s Liquid Floatant are great for CDC. A quick dip, and then false cast the excess off. CDC feathers don’t benefit from pre-dipping in liquid floatants- the micro fibers retain too much floatant, and won’t hold air bubbles. Liquid floatants must be cast off. Loon Lochsa is a gel-style floatant designed for CDC use, and won’t matt the feathers when applied properly. It has the added benefit of working on standard dries, so while a bit more expensive, Lochsa replaces the gink bottle. One less thing to carry, which is a good thing.

Floatants are a relatively modern invention, and anglers LOVE them! Missoula’s best fly fishing guides carry 3-4 different floatants, each having a specific purpose and usage. Anglers getting into CDC, as well as many others, buy Lochsa and continue to carry Gink. Embarrassingly, a quick survey of this blog writers flotant pocket showed Fly-Agra, Gink, Umpqua’s EZ Dry, Lochsa and two bottles of Frog’s Fanny.

When using CDC flies, you want a desiccant style floatant, like Frog’s Fanny, Shimizaki or High N Dry Powdered Floatant. No matter how well CDC feathers are initially treated, during use CDC absorbs water and soaks down to nothing. This nullifies CDC’s ability to hold air bubbles, which is why we use it. The best way to resuscitate matted CDC feathers are desiccants. Dessicants bring CDC back to life. Prior to desiccants, old school anglers carried amadou or a small chamois. If those are not available, at worst you just blow on the fly till the CDC fluffs back up. Yes, this blog writer has done that. Damn near hyperventilated in the middle of the hatch, when I HAD THE FLY. I hope everyone has that feeling at least once- to be in the right place at the right time with the right fly. It’s indescribable.

That fly was a Last Chance Cripple, a go-to for many of the best fly fishing guides in Missoula, and across the Rocky Mountains. Developed on the Henry’s Fork by the Harrop family, the Last Chance Cripple combines CDC with the classic Quigley cripple shape to take the fussiest trout. Big trout focus on cripples. Cripples often have a wing trapped in the water. The wing traps air bubbles, refracting light. Exactly like the air bubbles trapped in CDC. To this blog writer, that makes CDC worth learning how to use.

It’s a fussy feather. You need to recognize flies with CDC, so it’s treated correctly. CDC is found in many more flies than mentioned here. You’ll end up with multiple floatants to coat and then rejuvenate the feathers. CDC takes more on water maintenance, and maybe a more organized way to carry your flies! Segregation has bad connotations, but it may apply to CDC flies.

Sub-Surface CDC

With the advent of the Tungsten Jig style flies, CDC is being used in new ways. Because the fibers are easily torn, and look good after they’re shortened, CDC feathers are being used to collar many jig nymphs, like the Duracell, the Umpqua PT Jig, the Tungsten Yellow Spot Jig and many others. With only 1-2 wraps, the fibers don’t trap enough air to hinder sinking when first tied on, and once saturated, the CDC works like any soft hackle.

This is where CDC knowledge comes in handy. When a CDC hackled nymph is initially tied on, the fibers hold air bubbles, which is realistic to the trout. The collar adds attraction till saturated, then it only provides motion. The crafty nympher casts his Perdigon 3-4 times, and then uses a desiccant to dry the fibers. It now holds air bubbles again, and returns to being an attractor and advantage. Make sure to use the wand on the desiccant cap to dust the CDC hackle only. (blatant sales pitch for Frog’s Fanny and Dry Dust). Applying floatant to the nymph body inhibits sink rate.

Do anglers do this all the time? No, not really. Most of the time, it’s not necessary. But there are days when you need every advantage you can find just to get a trout to open its mouth. That’s when knowing about CDC wet fly hackle can be utilized to your advantage. It’s like all knowledge- it doesn’t have to be used all the time, but good to have. Knowledge is power- it’s why we write these blogs!

Direct Hype for Frog’s Fanny

This blog writer, and some of Missoula’s fly fishing guides, favor Frog’s Fanny as their desiccant. Too many fish have been hooked on the first cast after applying Frog’s Fanny to be ignored, both dry and nymph. It brings feathers, especially CDC, back to life after saturation, and adds a little sparkle. It’s no knock on the other desiccants- they do exactly as advertised and remove the moisture. Frog’s Fanny seems to have a little bit extra going for it. It’s an opinion, but it’s backed up by lots of empirical evidence … and no hard facts! Take it for what it’s worth.

Once you recognize and know how to use CDC on the water, it becomes a staple in your fly box. CDC’s fish attraction far outweighs the fussiness of the feather. It’s why the Harrop’s use it on the Henry’s Fork, one of the world’s most demanding rivers. It moves fish- easy ones and difficult ones. Once you understand the care and feeding of CDC, you’ll wonder why it took so long to start using it.

Bullet Points in Fly Fishing History

If you want to study fly fishing history, study the hook! The earliest hooks were discovered in Okinawa, and made from snail shells. Wikipedia says they are anywhere from 22.360 to 22,770 years old. Man has been looking to the ocean for food for quite some time!

Inshore, it probably didn’t take long to figure out there was food beneath a rise. All early man had to do was figure out how to get it. It took a while for technology to catch up with fly fishing, because it would be difficult to dress a snail-shell hook!  The first record of true fly fishing comes from the Roman author Aelius in 200 AD, from his book On The Nature Of Animals. In volume 17, he tells of Macedonians attaching red wool and two feathers to a hook, to imitate the Hippurus fly. The fly was attached to a 6’ rod that held a 6’ line. He called it the Macedonian way of fishing.

It’s important to note Aelius didn’t stumble upon this the first time it was done. This method of fishing had been in place for a while. While we date the first true fly fishing documentation as 200 AD, the tradition had been established before then. No one had bothered to write it down! Also note this is a Western version of history. As the world shrinks, and we get more information from China and Japan, the earliest date of fly fishing may change. The Chinese and Japanese have their own history of fly fishing that is just coming to light. We shall see!

Fly fishing was present throughout the Middle Ages. Reference to using a Vederangel (feathered hook) is found in German literature in the 13th century. If was known well enough to be a literary device, the idea of fly fishing was firmly established. Fly fishing is also referenced in Britain and Spain, as well as Japan. The writings are clear about fly fishing, but not very clear on details. But the seeds are there for Dame Juliana and her landmark achievement.

The first book on fly fishing to be published with moveable type was A Treatyse of Fysshynge wyth an Angle,credited to Dame Juliana Berners. She was a nun, and an avid fly fisherman. It was the first manual for fly fishing, detailing building rods, weaving horsehair into lines and listing 12 flies, one for each month of the year. The fly for May was an Ephemerella, or a Mayfly. The impact of this book still resonates with us today.

In 1496, an angler’s tackle consisted of a rod anywhere from 12-16 feet long, made of 3-4 pieces of solid wood, angled at the ends and spliced together with twine. The horse hair line was approximately the same length as the rod, and attached to the tip. Flies were dressed on hooks, which were often shaped pins, and the horsehair leader was snelled into the fly as part of the tying process. If you hooked a smaller fish, you yanked it out. Hook something bigger, and you tossed the rod in the water and let the fish tow it around till it tired. It was not an easy sport to pursue, as the angler had very few places to procure tackle. The very wealthy had gillies (someone hired to do nothing but maintain tackle and do stream keeping if applicable) but most made their own tackle.

Interestingly, Tenkara today is almost a carbon copy of the angling enjoyed in 1496. Of course, Tenkara rods are graphite, the line and tippets are polyvinyl and mono, but the concept is the same. The Missoulian Angler fly shop hasn’t fully embraced Tenkara- its simplicity doesn’t seem to appeal to the tackle junkies who work here! But there’s no doubting the ease of taking a Tenkara rod backpacking, or the thrill of sneaking close enough to feeding fish to make the technology of 1496 work today.

Change came slowly over the next 350 years. Rings (metal hoops held by a band and wrapped on with thread) were the first guides, which allowed the line to extend and retract. Silk was a new material, and it was incorporated into lines. Gut replaced horsehair as the leader of choice, and would remain so until 1945. With a moveable line came the reel. As the world expanded, the woods used in rod building became more varied, and as bamboo came from China, anglers knew they had found something that held some promise.

Initially, bamboo was used as it came from China, like a cane pole. It was lighter in weight, with some flexibility in the thinner sections. Ferrules were a tricky business in the early 1800’s, as anglers tried to get away from splicing rod pieces into place every time out. The metallurgy still hadn’t caught up with the need. But by 1847, rod tips were being made with 3-4 strips of shaved bamboo, though the process hadn’t come close to being perfected. That was done in America by Samuel Phillipe and Hiram Leonard. Both were originally gunsmiths by trade, and both helped revolutionize fly fishing. They moved to 6 strip construction (hexagonal) which is still the preferred design to this day. They built rods that truly cast, and were significantly shorter and lighter than their predecessors. Reels continued to improve, as did the silk lines. Rod action was now controllable and expanded, with lines manufactured in different thicknesses (weights) to enhance the now controllable action.

An angler in 1939 was decked out waterproof pants made of canvas sandwiching a layer of rubber. They used a hexagonal cane rod, either hand or machine planed. The reel was steel or aluminum, and the line was made of silk. The leader was still gut, which needed to be soaked the previous day or it had no flexibility. The picture our Missoula fly shop bathroom called Grandpas Tackle shows an aluminum gut soaker. The flies had integral metal eyes, and were dressed with much thinner thread than used in the 1800’s. The 1939 angler would be quite recognizable today, with tackle we would easily recognize and be comfortable with.

Then came WWll, and the world fought in ways that had never been experienced. From that carnage came plastic, fiberglass and Poly Vinyl. Rods went from cane to Fiberglass. Leaders went from gut to monofilament, and fly lines went from silk to poly coated. Spin fishing came from the technological explosion during the war. Fly fishing became easier and much more accessible. Tapered leaders were now extruded, not hand tied. Rods didn’t wear out, and required less maintenance. Lines lasted well over a year. Fly fishing was simplifying.

This blog writer learned how to fly fish using a cane rod with a plastic reel seat. When it was built, plastic was a marvel. Waterproof, almost unbreakable- it was a miracle of the modern age. I learned to spin fish before I learned to fly fish, and my grandfather provided me with a left-hand spinning reel.  I cast with my right hand, and reeled with my right hand, as I do today. In the early 1900’s, you cast right and reeled right, which made sense. A big bass or salmon rod weighed 9 ounces, and the reel might weigh 15. When you hooked a fish, you fought the fish with your “fresh” arm. By the early ‘60’s, left hand wind in fly fishing carried a stigma with old school fly fishers. It meant you started out spin fishing, and then moved to fly fishing. No grandson was going to go through life with that black mark on his head! So I reel right handed. Don’t sweat it, that thinking is long gone!

Things progressed until 1973, when Orvis introduced the first graphite rod. Talk about an upgrade! With graphite, rods became casting tools, built for power, accuracy and distance. New vistas opened up for fly fishing in the salt, as well as on streams and rivers. Rods weighed less, and reels soon followed suit. Fly fishing was getting easier and easier.

October 9, 1992. Brad Pitt stars, and Robert Redford directs. Fly fishing goes mainstream, and there’s no going back. In 1993, at the Fly Tackle Dealer Show, I got collared by Jim Murphy, president of Redington Rods at the time. You must try this rod. So I did. He asked me how much I thought the rod I’d just cast retailed for. I said $400-$450. He said $129, with a lifetime warranty. I said Bullsh*t. I said he cherry picked it- he brought me 5 more and they were all good rods. It was my introduction to overseas manufacturing of fly rods. In 1986, when I entered the fly fishing industry, I could say without hesitation that a good fly rod would cost you $375- half that if you put it together yourself, as I did. That changed in 1993. Fly fishing became (relatively) affordable, and the industry has never looked back.

I still have some of my grandfathers old tackle- rods, reels, flies and other assorted paraphernalia. I can say this without hesitation- we argue the finer points of rods like it makes a difference. Use one of my Grandpa’s “sticks”, and you know how they got that nickname. You’ll run back to your modern tackle so fast your head will spin. We’re in the Golden Age of fly fishing, and don’t let others tell you different. Our tackle is so far beyond what my grandfather used in 1978, it’s science fiction. Fly tying materials have never been better or more varied, The Feather Thief be damned. Be glad you have access to the best it’s ever been, because that’s what we have. Enjoy!!!!

George Kesel